Jump to content
2014FordFusionSE

2014 Fusion Parking Bulb Replacement with pics (168 bulb)

Recommended Posts

The parking bulbs on my Fusion were a bit of a pain to replace. After 3 tries and 2 youtube videos, I figured it out in case anyone's interested.


You don't need any tools and you don't need to remove any fenders or anything.

The easiest way to see them light up is to open the driver's side door.


The replacement bulb is a 168. I got the Sylvania 168 Long Life (2-pack). There's also an amber bulb option in case you want to 'mod' your ride ?

The original one lasted almost 7 years and so I went with the incandescent instead of buying an LED which costs 3 times as much.

Replace both side bulbs while you're at it because they'll go out almost at the same time (which is why they sell them in pairs.)


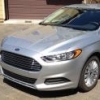
The parking bulb is in the same housing as the high-beam bulb:

287570626_Parkingbulbext.thumb.jpeg.c19d0dc216494c000b71064e965c4257.jpeg


Once you pop open the round rubber cover/cap from inside the hood, you'll have minimal access to the wiring (you can't see this but you'll have to feel it).

I took pics with my phone to 'see' what I could feel with my fingers:


1192596960_Parkingbulbint.thumb.jpg.ca6a8cc4453128335e6e611d04dcade3.jpg


Here's what the parking bulb connector looks like:

(You need to push only one tab and gently wiggle it out. You can't access both tabs. This was the missing trick)


174882375_Parkingbulbtabs.thumb.jpeg.ac00adbfcf0ea9a401ba7e5cf625df0e.jpeg


Gently pull the bulb out and replace it with a new one.

Open the driver's door and make sure that the bulb lights up.

Reinstall the parking bulb connector by feeling around inside the housing. You can look at the bulb/housing from the outside lens of the headlight to make sure it's fitted properly.

Make sure that you can't pull it out again.

Reinstall the high-beam connector and make sure it works by switching on the high-beams from inside

Replace the round rubber seal for the housing.


End product looks like this:

2047509920_Parkingbulblitext.thumb.jpeg.354fddcf0c88b380ed03f7997d66309f.jpeg


Burnt bulbs look like this:

91667584_Parkingbulbsdark.thumb.jpeg.9eba28f8f0999c700a1fd877bd93a8c0.jpeg


Happy to get feedback and answer any questions.


Share this post


Link to post
Share on other sites

Mine intermittently does not work, it starts working if I tap on the headlight, may work for several months or just minutes. 

I tried changing them but could not get my fingers in to release the tabs.  I didn't know it will come out with 1 tab pressed. I'll try again. 

Thanks for the pictures

Share this post


Link to post
Share on other sites
4 hours ago, billford said:

Mine intermittently does not work, it starts working if I tap on the headlight, may work for several months or just minutes. 

I tried changing them but could not get my fingers in to release the tabs.  I didn't know it will come out with 1 tab pressed. I'll try again. 

Thanks for the pictures


Yes, that was the trick. You need to push only one tab to wiggle it out. The actual bump that holds it in is very small.

To confirm, I tried it with the 2nd bulb as well and it was as easy to wiggle out.

I'm a pro now ?

Share this post


Link to post
Share on other sites

Ok this is embarrassing but I'm stuck on the rubber grommit.  There's no room there and I am afraid of tearing or cracking it in the cold if I use any tools.  It's on there pretty good.  Do you have pictures and/or advice how you pulled it off?  Is there a center cap that comes out as it seems or does the whole cap of rubber come off?


Thanks for this post.

Share this post


Link to post
Share on other sites
4 hours ago, Sky14FFH said:

Ok this is embarrassing but I'm stuck on the rubber grommit.  There's no room there and I am afraid of tearing or cracking it in the cold if I use any tools.  It's on there pretty good.  Do you have pictures and/or advice how you pulled it off?  Is there a center cap that comes out as it seems or does the whole cap of rubber come off?


Thanks for this post.


I'll check tomorrow and let you know.


If I remember correctly, I pinched the 'lip' and pulled it slightly. It's supposed to be a bit snug and fits inside the 2 metal circular rims in image 2.


Worst case, you'll have to buy a replacement.

If it tears or cracks, it probably needed to be replaced anyway.

Share this post


Link to post
Share on other sites

I just tried it and I was able to open it just like you would open a can of pringles or planter's peanuts.

It's flexible enough and the last image shows that the inside lip is what holds it in place.


Hope that helps.

Bulb Grommet on.jpg

Bulb Grommet off.jpg

Grommet top.jpg

Grommet inside.jpg

Edited by 2014FordFusionSE

Share this post


Link to post
Share on other sites

Ok yeah that helped but it was a PAIN.   And it was cold even in the garage.  Had to use channel lock pliers like these to grab the lower tab and pry it off.  Top side was still on real tight as it is wedged behind the radiator support.  It was on with a lot of suction.  Was even stubborn getting it back on.

Then WE used a borescope I got last June from amazon essentially for free to see what we were doing, and that was tricky.  I could only reach the lower tab with one of my longest fingers. The Missus had the idea of using a coat hanger bent in a narrow loop to push down on the top tab, then I wiggled it loose.  Didn't disconnect the high beam.  I had to give her credit for the coat hanger idea and I'm really glad the tabs don't require much force.  The bulbs are super cheap on Rockauto but I got 2 Sylvania Long life from Walmart for $4.75.  I won't change the other side, will just keep the extra bulb in case it ever burns out. Took me about 45 minutes, most of it headscratching.  Well saved $130.   Dumbest design.


Thanks

Edited by Sky14FFH

Share this post


Link to post
Share on other sites

Glad to know you were able to change it.


The first side took me a while because I didn't know that I could wiggle the bulb socket out with only one tab pressed, which is why I created this post with pics.

I had tried twice before and almost gave up.

I also asked the dealership and they said they would have to remove the headlight to replace it ?


Once I figured out the trick, the second side was done in less than 15 minutes.

As you can see in the bulb picture that both bulbs look equally burnt. You'll have to tackle the second side soon.


The borescope is very handy. I didn't have it when I changed the bulbs but I bought one last year.

Share this post


Link to post
Share on other sites

Just tried for over 2 hours on this.   Was not able to push the tab to replace and gave up.  Not a lot of space for my big hands.  I had replaced one of my fog lights in the summer and that took 2 hours!   Will try again, but definitely a pita!   I can wiggle the bulb, but can get the tab to pull it out.  


Share this post


Link to post
Share on other sites

Join the conversation

You can post now and register later. If you have an account, sign in now to post with your account.
Note: Your post will require moderator approval before it will be visible.

Guest
Reply to this topic...

×   Pasted as rich text.   Paste as plain text instead

  Only 75 emoji are allowed.

×   Your link has been automatically embedded.   Display as a link instead

×   Your previous content has been restored.   Clear editor

×   You cannot paste images directly. Upload or insert images from URL.

Loading...

×
×
  • Create New...